4.3-acceptance-criteria
On this page
Acceptance Criteria
Acceptance criteria define the specific conditions that must be met for a user story to be considered complete. VibeMap generates these in BDD format (Given/When/Then), providing clear, testable requirements that developers and QA teams can use as a shared definition of done.
What Acceptance Criteria Are
An acceptance criterion is a precise, verifiable statement that describes how a feature should behave under specific conditions. Unlike user stories (which describe what and why), acceptance criteria describe exactly how -- the specific behaviors, validations, and outcomes the implementation must satisfy.
The Given/When/Then Format
VibeMap uses Behavior-Driven Development (BDD) syntax for acceptance criteria:
| Clause | Purpose | Example |
|---|---|---|
| Given | The precondition or starting state | "Given a user is on the login page" |
| When | The action the user takes | "When they enter an invalid email and click submit" |
| Then | The expected outcome | "Then an error message 'Please enter a valid email' is displayed" |
This format makes criteria unambiguous, testable, and readable by both technical and non-technical team members.
How Acceptance Criteria Are Generated
Acceptance criteria are generated automatically alongside user stories during feature generation. The AI creates criteria by analyzing:
- The parent user story -- the specific action and benefit described
- The parent feature -- the broader functionality context
- Industry best practices -- standard validation rules, error handling, and edge cases for the type of functionality described
Each user story typically receives 3-8 acceptance criteria covering different scenarios.
Scenario Categories
The AI generates criteria across three scenario types to ensure comprehensive coverage:
Happy Path
The expected, successful flow. These criteria describe what happens when everything works as intended.
- "Given a user enters valid credentials, when they click login, then they are redirected to the dashboard"
- "Given a customer adds an item to the cart, when they proceed to checkout, then the item and price are displayed correctly"
Error Scenarios
What happens when something goes wrong. These criteria cover validation failures, invalid inputs, and system errors.
- "Given a user enters a password shorter than 8 characters, when they click submit, then an error message is displayed and the form is not submitted"
- "Given the payment gateway is unavailable, when a customer attempts checkout, then a friendly error message is shown and the cart is preserved"
Edge Cases
Boundary conditions and unusual but valid situations. These catch the scenarios that are easy to miss during development.
- "Given a user uploads a file exactly at the 10MB limit, when the upload completes, then the file is accepted and stored successfully"
- "Given a search query returns zero results, when the results page loads, then an empty state message with suggested actions is displayed"
Viewing Acceptance Criteria
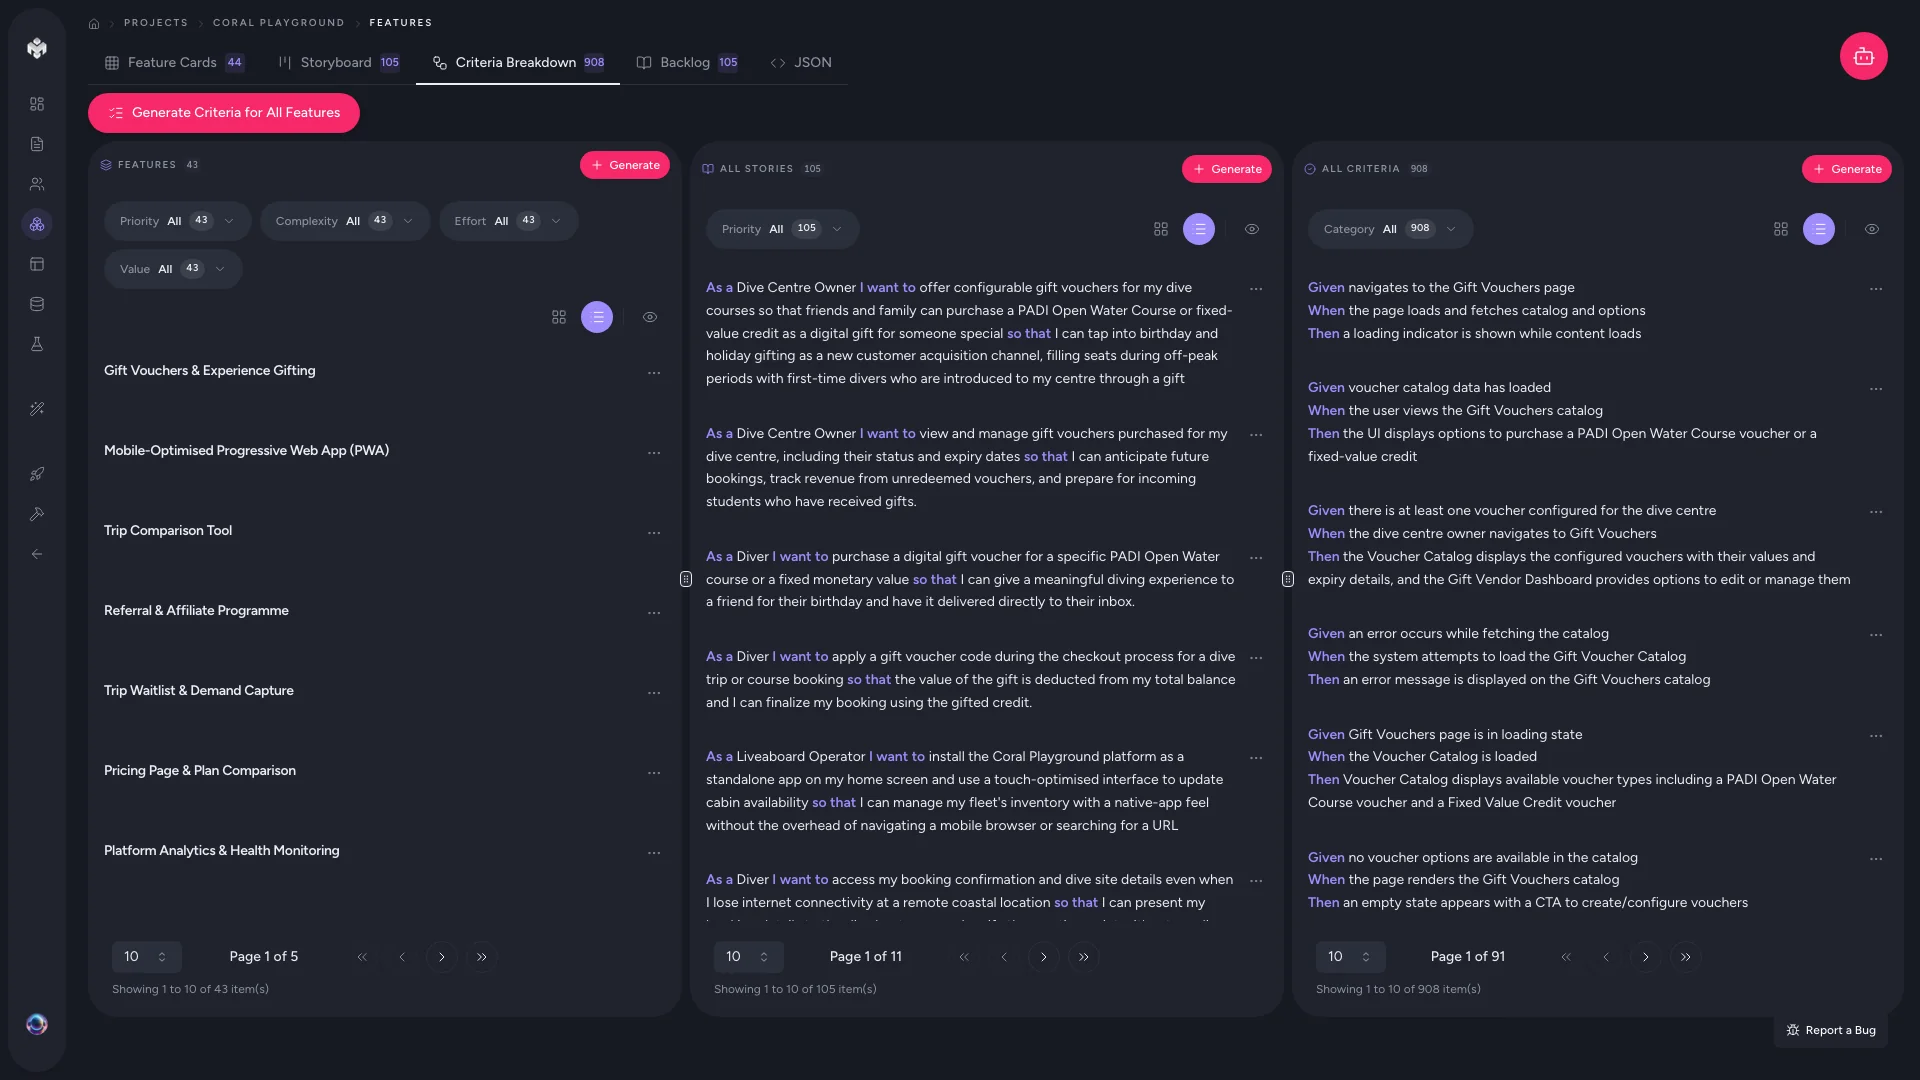
Criteria Breakdown Tab
The primary view for working with acceptance criteria. Access it from the Features tab by selecting the Criteria Breakdown view.
This view presents a hierarchical structure:
Feature
  User Story
    Criterion 1 (Given/When/Then)
    Criterion 2 (Given/When/Then)
    Criterion 3 (Given/When/Then)
Each criterion displays its full Given/When/Then statement, along with:
- Type -- Functional or Non-functional
- Priority -- High, Medium, or Low
- Status -- Not Started, In Progress, or Completed
Within Feature Details
You can also view criteria by clicking on any user story in the table or storyboard views. The story's detail panel shows all associated acceptance criteria.
Managing Acceptance Criteria
Adding Custom Criteria
- Open a user story's detail view
- Click Add Criteria
- Write the Given/When/Then statement
- Assign a type and priority
- Save
Editing Criteria
Click the edit icon on any criterion to refine its wording. Common edits include:
- Making conditions more specific (e.g., adding exact character limits or timeout values)
- Adding non-functional requirements the AI missed (e.g., accessibility, performance thresholds)
- Adjusting priority based on your team's testing capacity
Deleting Criteria
Remove criteria that are out of scope or redundant. If you use VibeMap's code or test generation features, deleted criteria will not be included in generated output.
Quality Checklist
When reviewing generated criteria, verify that each one:
- Is specific and measurable -- no vague language like "should be fast" or "must look good"
- Covers a single behavior -- one Given/When/Then per criterion
- Is testable -- a developer or QA engineer could write an automated test from it
- Includes the expected outcome -- the "Then" clause must describe a verifiable result
How Criteria Connect to Other Steps
Acceptance criteria are the most granular level of your project specification. They feed into downstream generation:
| Step | How criteria are used |
|---|---|
| Schema generation | Data validation rules inform database constraints |
| Code generation | Criteria become comments and test case scaffolds |
| PRD export | Criteria are included as the definition of done per feature |
Next Steps
With acceptance criteria in place, your functional specification is complete. You now have a full hierarchy -- features, user stories, and acceptance criteria -- that defines what your product does, for whom, and exactly how it should behave. Proceed to Pages and Components or Schema generation to continue building out your project.