Creating Your First Project
On this page
Creating Your First Project
Choose a starting point, describe your product, and get an AI-generated project summary to build on. · Required
This is the entry point to the whole journey. It walks you from the New Project button to a reviewed project summary — the foundation every downstream generation builds on. If you'd rather begin from a ready-made foundation, see Starting from a template instead.
Step 1: Choose how to start
From the dashboard, click New Project. VibeMap first asks How would you like to start? with two options:
- Start from an idea — describe your product and let the AI generate the full spec from your prompt. Best for new projects and early-stage ideas.
- Start from existing code — connect your IDE to VibeMap via the MCP server and let your AI coding agent scan your codebase and reverse-engineer it into structured specs. Best when a codebase already exists. (MCP access is a Pro-plan feature.)
You can use both flows later — they populate the same project. The rest of this page follows Start from an idea; for the code-first path see Connect your IDE.
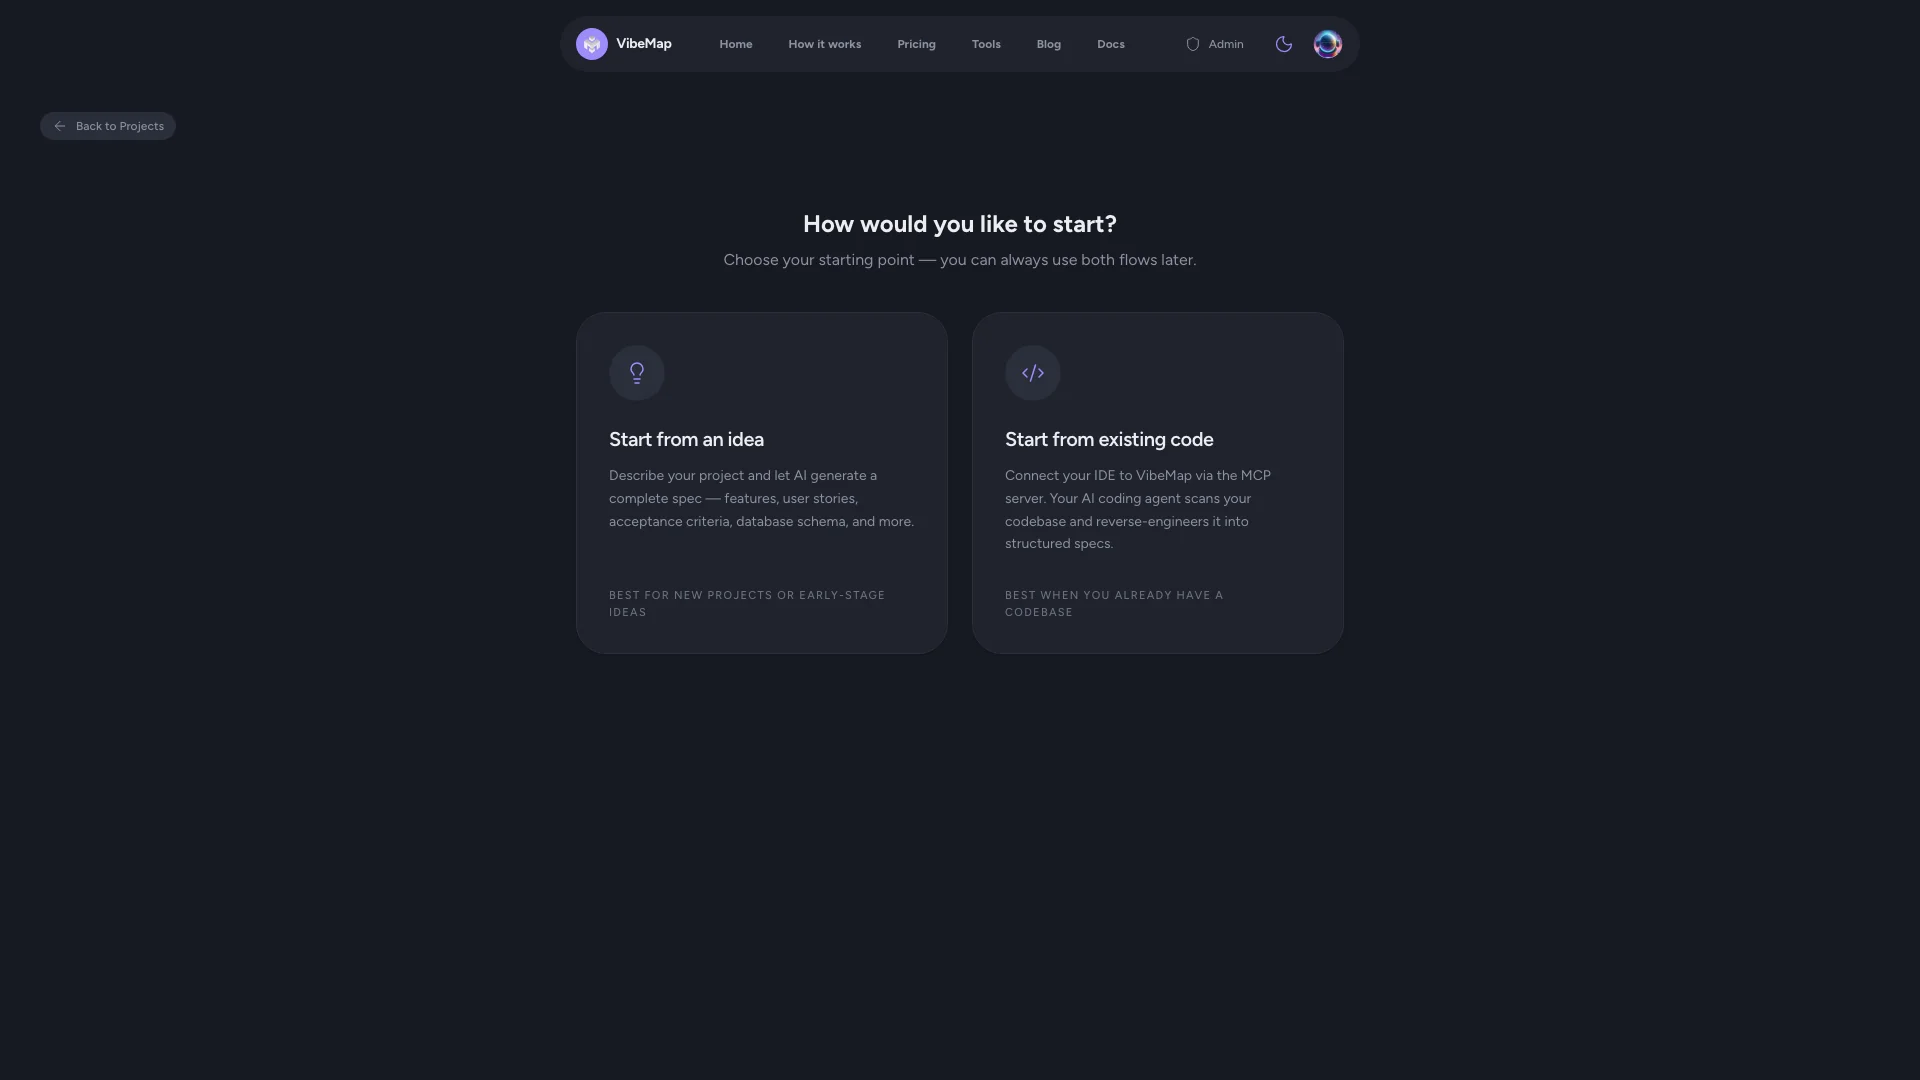 Figure: Choose how to start.
Step 2: Fill in the project details
The Create New Project form has two fields.
Project name
A short, descriptive name — this is how the project appears in your dashboard and throughout the app.
- Keep it concise (2–5 words).
- Use the product name if you have one, or a descriptive label.
- Examples: "TaskFlow", "Recipe Sharing App", "Freelancer CRM".
Project description (prompt)
The most important field. Write a natural-language description of the product you want to build — the AI uses it as the foundation for everything it generates. The panel beside the form prompts you to cover:
- What the app does — its core purpose and what users accomplish.
- Who it's for — the target users and their roles.
- Core features — the 3–5 main things users can do.
- What problems it solves — the pain points it addresses.
- Any specific requirements — stack, integrations, or unusual workflows (optional).
You don't need to be exhaustive — a few well-written paragraphs beat a vague essay. See Writing effective prompts for detailed guidance and worked examples.
💡 Tip: You can pick which AI model runs the generation from the model selector on the form. The default economy model is fast and fine for a first pass; switch to a stronger model for a complex or high-stakes spec.
Step 3: Submit and wait for generation
Click Create Project. The AI pipeline analyses your prompt and generates a project summary — a structured overview capturing your product's goals, target audience, value proposition, and scope. This usually takes 15–30 seconds; a progress indicator runs while it works. When it finishes, you're taken into the project.
Step 4: Take the first-visit tour
On your very first project, a short three-step tour spotlights the layout you'll use everywhere:
- Your project journey — the four-phase nav (Research → Plan → Prepare → Develop); the dots show what's already generated.
- Always know the next step — the progress strip tracks the journey and points at the single best next action.
- Meet your agent — the conversational agent can run generations, edit your spec, and answer questions; reference anything by its code.
The tour appears once per browser. Dismiss it any time with Skip or the ×.
Step 5: Review the project summary
The summary is the AI's interpretation of your idea, organised into clear sections — overview, target audience, core value proposition, key goals, and scope.
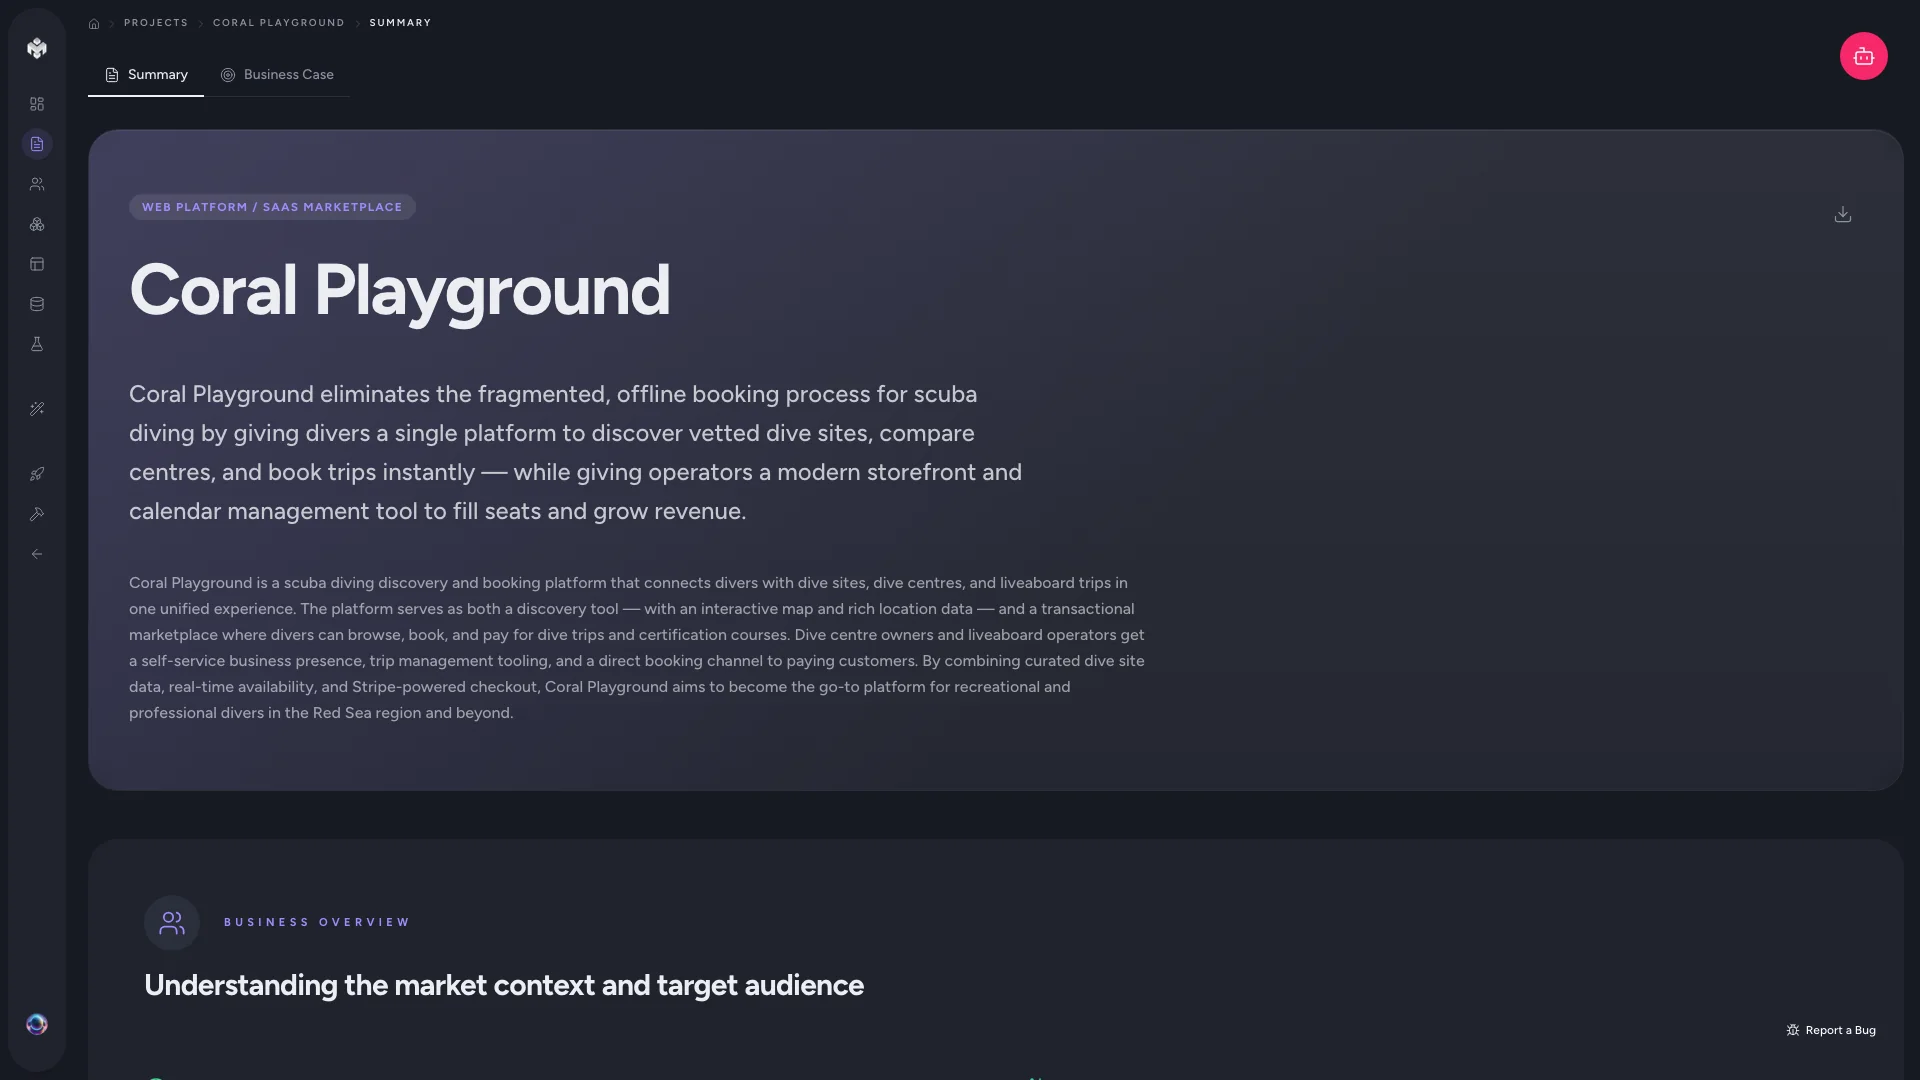 Figure: Project summary.
Review it carefully — it sets the direction for every downstream generation. If the AI misread something:
- Edit the summary directly to correct any misinterpretation.
- Regenerate it if the overall direction is off.
- Refine your prompt and start a new project if it's badly wrong.
Getting the summary right is worth the time: it cascades into better personas, features, and everything else. Full detail in Project summary.
Step 6: Generate the rest of the spec
With the summary confirmed, work through the journey. The sidebar and the progress strip recommend the order (green dots mark completed steps):
- Business case — live-web-research market validation (Research phase; optional but recommended).
- Personas — target user profiles.
- Features — core product functionality.
- User stories — requirements from the user's perspective.
- Acceptance criteria — testable definitions of done (derived from features and stories).
- Pages & sections — UI structure and routes.
- Database schema — data model and relationships (pages first: page layouts give the schema generator better context).
Each step builds on the ones before it, so generating in order produces the most coherent result — but it's a loop, not a line: once pages exist you can cross-check acceptance criteria against them to close gaps. When the spec is complete, run Prepare for Dev to consolidate it into a build-ready blueprint.
Step 7: Hand off to your AI coding agent
Once the spec is in shape — features approved, acceptance criteria reviewed — connect your IDE's AI coding agent (Cursor, Claude Code, Windsurf, VS Code Copilot) to VibeMap over MCP. Your agent picks up work one acceptance criterion at a time, implements it in your codebase, and submits for review. Full walkthrough → Handoff overview.
⚡ Power-user hints
- Let the agent drive. Instead of clicking each generation, ask the conversational agent to run them ("generate personas, then features"). Its suggested-action chips always offer the right next step.
- Don't skip the summary review. Two minutes fixing the summary saves regenerating every downstream artifact later.
- Experiment freely. Every generation is versioned — regenerate as often as you like and revert if a version was better.
↔ The traditional way
Kicking off a project by hand means a discovery workshop, a PM writing a brief, and a first PRD draft circulated for review — often a week before anyone agrees on scope. VibeMap compresses that into a single form and a 30-second generation, then keeps the resulting summary editable so you refine direction in place rather than in a doc thread.
What's next
- Writing effective prompts — sharpen your description for better output.
- Generating personas — the next step in the journey.